
How to Replace RV Windows?
Once the decision has been made that an RV window cannot be repaired and must be replaced, you need to remove the old window and order a replacement window. But first of all you need to understand what kind of RV replacement windows are there and which one do you need.
Table of Contents
Types of RV Replacement Windows
Fixed Pane RV Windows
A fixed pane RV window has no moving parts; it is for visibility or lighting only and does not open for ventilation. It may be a double-pane thermal unit, which offers the highest energy conservation. Various tints and levels of shading are available as well as various grades of thermal efficiency.
- Fixed Pane – Any RV window that does not open, move, or slide.
- Picture Window – Fixed pane windows in larger widths may be called “picture windows”, the same as in a residence.
Like most RV windows, the picture window and other fixed-pane types will have rounded corners (radius corners). Its main advantage is that its simplicity results in low cost.
Sliding Pane RV Windows
This is probably the most common type of RV window. Sliding windows of various configurations have at least one movable pane that slides in a track; opening the slider permits ventilation of the unit. The direction of the motion of the sliding panel determines the window type.
- Horizontal Slider – one or more panels slides horizontally. The sliding pane may be on the left or on the right. Horizontal sliders come in square, rectangular, angle (trapezoid) or double angle (parallelogram) shapes.
- Vertical Slider – One or more panels slides vertically. The sliding pane is most often on the bottom for convenient access.
- Picture Slider – This is a wide window with a short horizontal slider at each end.
- T-Bar Slider – A vertically oriented RV window that has a fixed pane on top with one or two horizontal sliders at the bottom. Some manufacturers offer a T-Bar with the fixed pane on the left or right with a smaller fixed pane/vertical slider on the opposite side.
Crank Windows
Also known as louver windows, slated windows (because the panes overlap like slates on a roof), and glass crankout windows.
- Jalousie windows – Used in the ’50s and ’60s in such units as the Trillium ultralight. While they provided good ventilation and would shed rain because of their slope, making them popular in verandas in warm climates, the lack of a seal between panes meant that weather tightness and energy efficiency were low.
- Crank Windows – Hehr, one of the leading American manufacturers of RV windows, calls these “Torque” windows, though this does not appear to be a brand name. A modern refinement of the jalousie.
The benefit of a crank window is that it permits a larger ventilation opening, and because the glass vents have no banding or frame, they are said to offer superior lighting and viewing. The number, location, and size of the louvre panels will vary with the size and type of the window.
Egress Windows (Escape Windows)
An egress window is any RV window that opens to permit occupants to vacate the unit in the event of a fire or other emergency.
Egress windows are available for slider, crank, and fixed pane windows. The part that opens for egress is generally hinged at the top and secured firmly by lock levers. The opening may be the entire window or one particular section.
For a replacement RV window, the owner is not restricted to an exact OEM (original equipment manufacturer) replacement. Another type of window that might offer greater energy efficiency, improved ventilation, or more safety can be considered.
Removing the RV Window for Replacement
An RV window generally consists of an outer frame (containing the window itself, with fixed or sliding panes and insect screen) and an inner ring.
- In older models, the outer ring is screwed to the frame and the inner frame is a decorative cover.
- Newer windows use a two-piece compression system that clamps onto the window frame, with the screws on the inside of the RV
- The retaining screws, whether on the inside or the outside, may be covered with a removable decorative plastic strip.
- The outer ring will also be held in place by sealant which will have to be worked free.
Remove the sliders if possible. If a pane is cracked or broken, use work gloves and eye protection to reduce the risk of injury.
- For horizontal sliders, removal usually involves lifting the pane up, then removing the bottom from its track towards the inside of the RV and dropping the pane out of the upper track.
- Vertical sliders may have a cutout at the top of the track where the pane may be removed. In other cases, the sliders are held in place by a separate track insert that can only be removed after another part is removed.
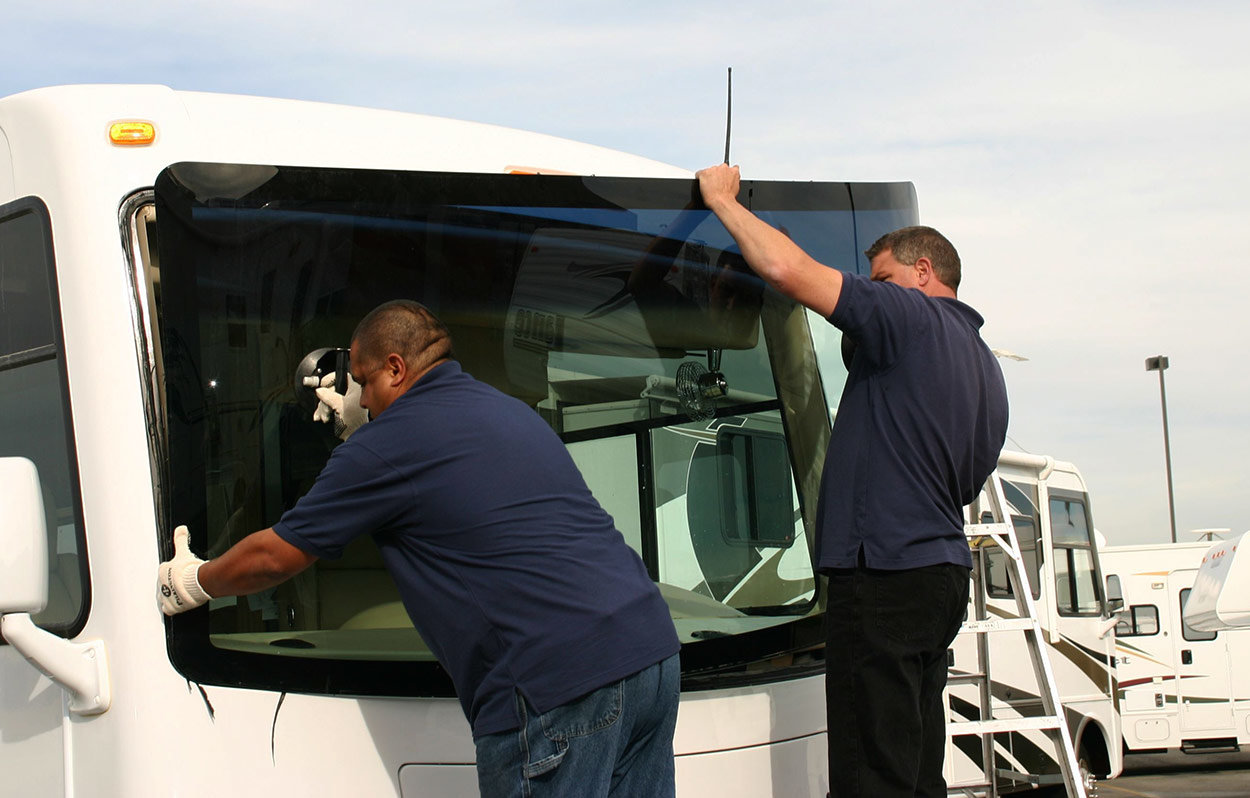
Remove from the retaining ring all but a couple of screws at the left and right sides then get ready for removal. The window / frame must be removed from outside the RV. Smaller windows may be taped to the siding to support them, but larger windows will need someone outside, working safely on proper scaffolding if necessary, as even the empty frames may have considerable weight.
The seal between the exterior window frame and the siding – usually butyl rubber tape – will probably hold the window frame in place even after all screws have been removed.
- Firm pressure at one corner from the inside may break the seal.
- Heating the frame with a hot air gun or hair dryer may soften the adhesive to aid in removal.
- If the seal is dried and hard, it may be necessary to work it free with a putty knife, taking care not to damage the siding (a strip of thin plywood may work both as a fulcrum to pry on and a way to protect the siding).
Once the window is out, the rough opening and frame thickness can be measured for a replacement RV window. Or, if the OEM replacement window is on hand, the area around the opening can be cleaned and the new window inserted. The procedure is roughly the reverse of the steps for removal, but in any case follow the instructions that came with the replacement RV window.
Removing an RV window takes a little care but it can be done. The time it takes and the difficulty of the job depends on the age of the unit and the stubbornness of the screws and seals.
How to Measure for an RV Replacement Window
If there is no window model number to order an OEM replacement or exact match, the rough opening measurements will be needed before a replacement RV window can be ordered.
Measuring up a rough opening is usually fairly simple, even for oddly-shaped windows. Remember that it is necessary to remove the old window and its frame to get these measurements.
- Tape Measure
- Carpenter Square
- Protractor (optional)
- Paper and pencil for recording measurements (or spec sheet; see below)
- Roll of butcher paper or sheet of cardboard (optional, for oddly shaped windows)
There are two main points to keep in mind
- Measure the opening, not the old window – rather than trying to duplicate the previous window, the replacement window company will make a window to fit the hole.
- Take care and be accurate. The replacement window company can only do as good a job as the measurements they’re given.
Measuring Window Hole Size (Rough Opening)
If you have a specific replacement window company in mind, check their web site. They probably have a specification sheet for download or print out that shows exactly what measurements they need, with space to record them. However, some sites only have an online form with fields to enter the measurements.
Take all measurements to the nearest 1/16 inch or nearest millimeter.
- Width – the side to side measurement – at top and bottom (note any variance)
- Height – the top to bottom measurement – at both sides (note any variance)
- Angle – Check square on all corners. For windows that are trapezoids or parallelograms, measure the angle at each corner using a protractor or angle finder. Make a pattern tracing if necessary, then measure the angle on the tracing.
- Wall Thickness – This includes everything from the exterior siding or skin to the interior finish surface. Peninsula Glass, manufacturers of Motion Windows™ emphasizes that “This dimension is absolutely critical to the final fit and finish of your new windows.”
Measuring Corner Radius
Windows with rounded “radius corners” are common. On RV windows, the usual radius is 3″ but don’t assume – measure! There are several ways to determine the corner radius.
- Using a carpenter square – align the inside edges of the square along the sides of the hole and read on the scale the point where the curve starts. This works only for square or rectangular openings.
- Using a tracing – Trace the corner curve onto a sheet of paper or cardboard. For square corners, the straight lines can be extended and the radius determined as with a carpenter’s square. Pelland Industries Window FAQ 4 shows how to do this. For other angles, the radius can be determined using a compass and straightedge and a little basic geometry.
- Using found objects – Collect a variety of cylinders (coffee cans, soup cans etc) and match them to the curve. Once an exact match is found, its diameter can be taken with the tape measure. The radius is half the diameter.
Making a Tracing Pattern
For windows with special shapes, such as trapezoids and parallelograms, it may be necessary to make a pattern by tracing the rough opening. To do this,
- Remove the existing window
- Tape or hold a sheet of paper (brown paper, poster board, cardboard) to the wall. The inside wallis first choice, but outside wall will work. It is important that the paper be firmly against the outside edge of the hole so enlist a helper if necessary
- Carefully trace the hole opening with a sharp pencil or fine-tip marker. Lines must be clear and thin.
The tracing can then be used to make accurate measurements of each side, angle, and radius. Alternately, the tracing can be submitted to the replacement RV window manufacturer.
Sourcing an RV Replacement Window
If an OEM (Original Equipment Manufacturer) window is available, this is probably the simplest choice. There are a number of possibilities for sourcing a replacement RV window:
- A local RV parts center that sells the same line of RV may carry an exact replacement or will order it in.
- Contact the OEM manufacturer (assuming they’re still in business) and provide the window number. This can often be found on the window frame. It may be necessary to remove the sliders to read the plate, decal, or sticker that gives the window number.
If the OEM sticker is missing or illegible, providing the model number and year of the rig may enable the manufacturer to identify the window required. If the original window manufacturer is no longer available or if a local alternative is preferred, it will be necessary to remove the old window and measure the rough opening to order a replacement window.
Submitting the Measurements
Once all the measurements have been recorded, they can be used to fill in the online form to order the replacement window.
The window will be manufactured smaller than the rough hole dimensions to assure that the window will fit within the hole and you have the ability to square the window in case the hole is not square.